Frigidaire FFEH3054US Installation Manual
Browse online or download Installation Manual for Baby furniture Frigidaire FFEH3054US. Frigidaire FFEH3054US Installation Instructions [no] User Manual
- Page / 16
- Table of contents
- BOOKMARKS
- INSTALLATION INSTRUCTIONS 1
- 1. Clearances and Dimensions 2
- 2. Tools You Will Need 3
- Instructions 3
- 3. Electrical Connection 4
- Requirements 4
- Final Location 7
- 7. Care, Cleaning and 8
- Maintenance 8
- 6. Model and Serial Number 8
- Location 8
- Before You Call for Service 8
- LA ESTUFA ELECTRICA DE 30” 9
- 1. Espacios y dimensiones 10
- 2. Herramientas que va a 11
- 3. Requisitos de conexión 12
- 4. Conexion electrica a la 13
- Conexión Tetrafilar 14
- 5. DESLICE CON CUIDADO LA 15
- ESTUFA HASTA SU LUGAR 15
- DEFINITIVO 15
- 7. Cuidado, limpieza y 16
- 6. Ubicación del modelo y 16
- Antes de llamar al servicio 16
Summary of Contents
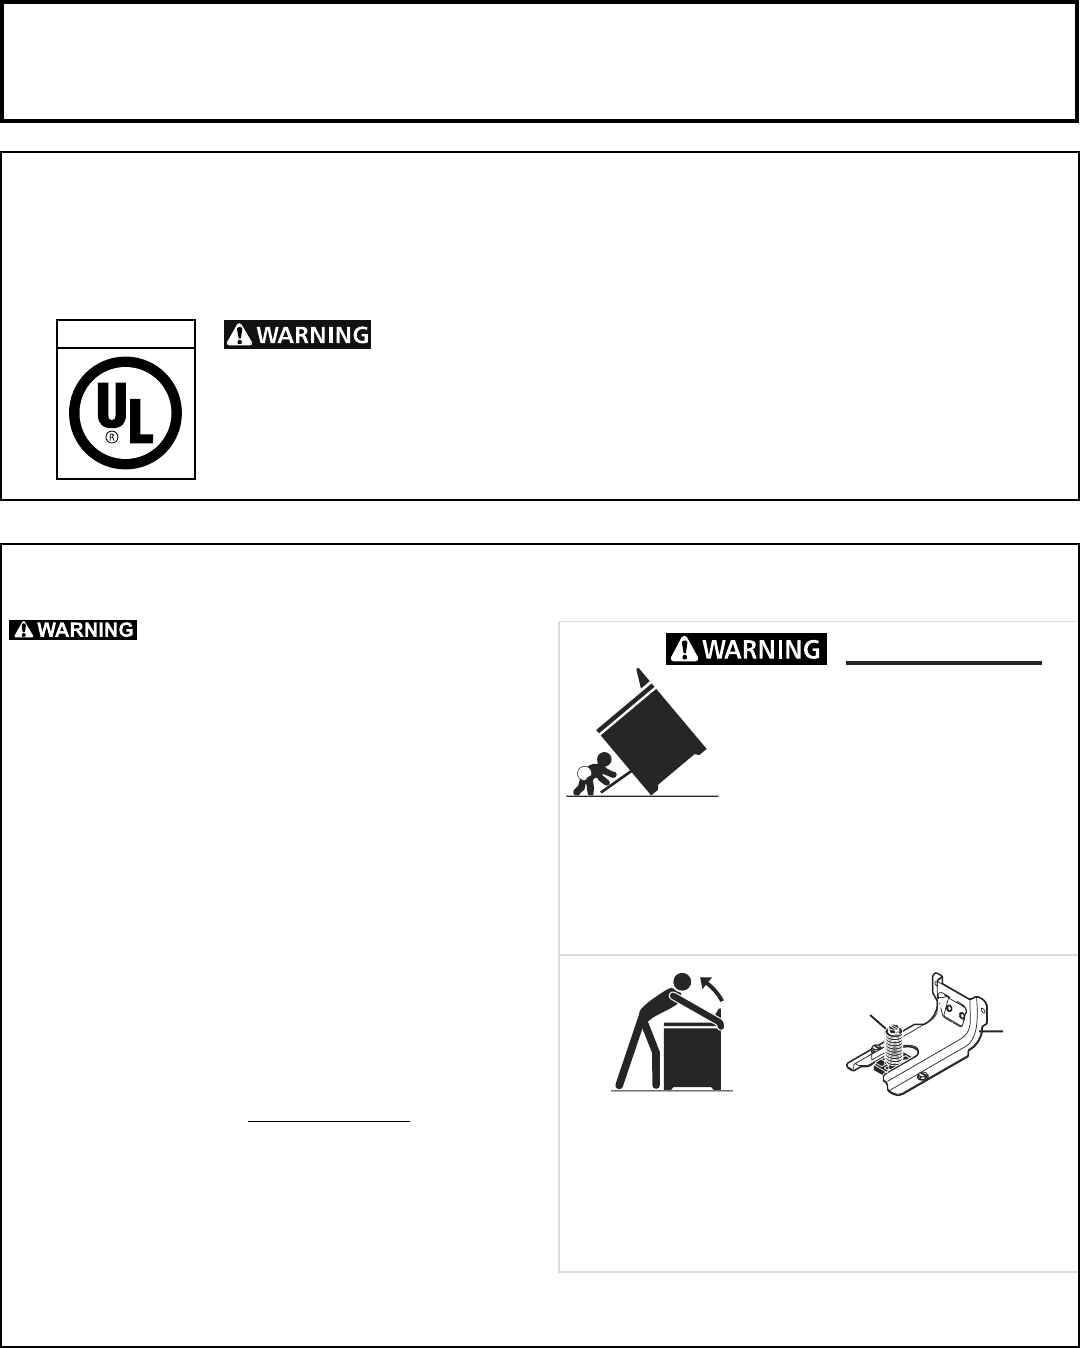
1INSTALLATION INSTRUCTIONSFRONT CONTROL FREESTANDING ELECTRIC RANGEINSTALLATION AND SERVICE MUST BEPERFORMED BY A QUALIFIED INSTALLER.IMPORTANT: SAVE
10INSTRUCCIONES DE INSTALACION PARA LA ESTUFA ELECTRICA DE 30”1. Espacios y dimensionesa. Proporcione espacios adecuados entre la estufa y las superc
11INSTRUCCIONES DE INSTALACION PARA LA ESTUFA ELECTRICA DE 30”2. Herramientas que va a necesitar3. Instrucción para la instalación de las jaciones de
12INSTRUCCIONES DE INSTALACION PARA LA ESTUFA ELECTRICA DE 30”C. Nivele y ubique la estufa - Nivele la estufa ajustando los cuatro (4) tornillos nive
13INSTRUCCIONES DE INSTALACION PARA LA ESTUFA ELECTRICA DE 30”NOTA: El rango se envía de fábrica con oricio de 1-3 / 8 “de diámetro, como se muestra.
14INSTRUCCIONES DE INSTALACION PARA LA ESTUFA ELECTRICA DE 30”4B. CONEXIONES DEL CORDON DE ALIMENTACION(Instrucciones para conexión trilar para insta
15INSTRUCCIONES DE INSTALACION PARA LA ESTUFA ELECTRICA DE 30”4C. CONEXIONES DEL CABLEADO PERMANENTE TRIFILAR Y TETRAFILAR3 - Conexión trilar permane
16INSTRUCCIONES DE INSTALACION PARA LA ESTUFA ELECTRICA DE 30”7. Cuidado, limpieza y mantenimientoConsulte el Manual de uso y cuidado para las instruc
230” ELECTRIC FRONT CONTROL FREESTANDING INSTALLATION INSTRUCTIONS1. Clearances and Dimensionsa. Provide adequate clearances between the range and adj
330” ELECTRIC FRONT CONTROL FREESTANDING INSTALLATION INSTRUCTIONS2. Tools You Will Need3. Anti-Tip Bracket Installation InstructionsImportant Safety
430” ELECTRIC FRONT CONTROL FREESTANDING INSTALLATION INSTRUCTIONSC. Level and Position Range - Level range by adjusting the (4) leveling legs with a
530” ELECTRIC FRONT CONTROL FREESTANDING INSTALLATION INSTRUCTIONSNOTE: Range is shipped from factory with 1-3/8" dia. hole as shown. To use eit
630” ELECTRIC FRONT CONTROL FREESTANDING INSTALLATION INSTRUCTIONS4B. POWER CORD CONNECTIONS(3-Wire Connection InstructionsFor existing installations
730” ELECTRIC FRONT CONTROL FREESTANDING INSTALLATION INSTRUCTIONS4C. 3 & 4-WIRE PERMANENT WIRE CONNECTIONS3 - Wire Permanent Connection - follow
830” ELECTRIC FRONT CONTROL FREESTANDING INSTALLATION INSTRUCTIONS7. Care, Cleaning and MaintenanceRefer to the Use & Care Manual for cleaning ins
9INSTRUCCIONES DE INSTALACIONLA ESTUFA ELECTRICA DE 30” LA INSTALACION Y EL SERVICIO DEBEN SER EFECTUADOS POR UN INSTALADOR CALIFICADO.IMPORTANTE: CON
More documents for Baby furniture Frigidaire FFEH3054US

Related products and manuals for Baby furniture Frigidaire FFEH3054US

 (16 pages)
© 2020, manymanuals.com. All rights reserved. | 0.527 s |
 Manymanuals.com
 Manymanuals.de
 Manymanuals.fr
 Manymanuals.it
 Manymanuals.pl
 Manymanuals.cz
 Manymanuals.es
 Manymanuals-pt.com
Comments to this Manuals